Many Google tools have a free BigQuery export either through BigQuery Data Transfer Service or built-in in the tool itself. Unfortunately, Search Console does not. That leaves two options for getting your Google organic search performance data to BigQuery: 1. Purchase a managed data pipeline, 2. Build your own integration.
In this case, option number two is very viable. That’s because the data itself is quite easily accessible through Search Console API. There’s also a delay of up to a few days already in the tool itself. So, there is no need for more complex update logic. It’s OK to check for new data, for example, once a day.
In this article, I’m going to guide you through how to set up your own data export from Search Console to BigQuery. For that, we’ll be using a Google Cloud Function (Node.js) and Cloud Scheduler for scheduling the export to happen daily.
Available data
The data available through the API is always aggregated and can include these dimensions:
- Country
- Device
- Page
- Query
Search appearance dimension is also available but can’t be used together with the other dimensions.
The most granular data can then be retrieved by including all four dimensions and performing one request per day of data.
Use cases
Why export Search Console data to BigQuery? One reason is that in Search Console, the data is persisted only for 16 months. Sending the data to BigQuery allows you to store it for a longer time.
Perhaps the main benefit still comes from having the data from all marketing data sources in one place. That makes it easier to perform analysis or prepare datasets for BI tools. One use case could be to build a complete search report, combining paid and organic search.
Getting started
The Google Cloud Function requires several permissions to run. It needs to fetch new data from the Search Console API and manage the data in BigQuery. You’ll also need to enable the Google Search Console API in your Google Cloud project.
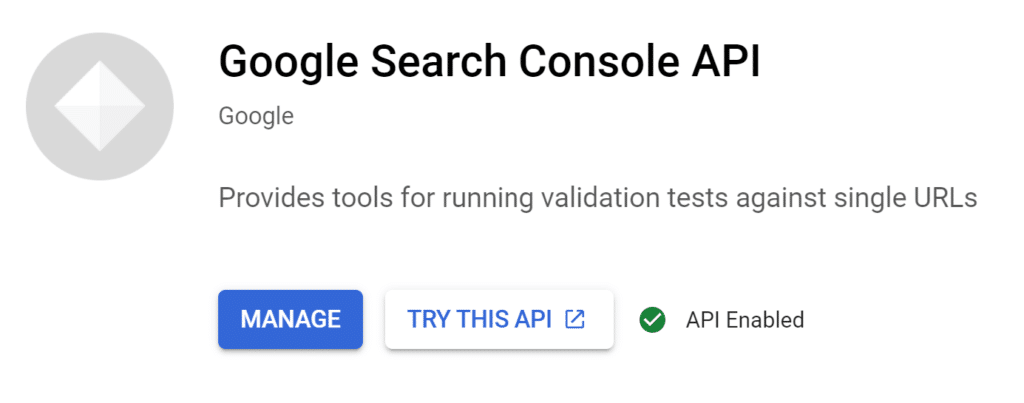
Enable the API
The easiest way to find the API in Google Cloud is through global search. Search for Search Console.

Enable the API. Once enabled, you’ll see the green API Enabled checkmark.
Configure accesses
Google Cloud functions use service accounts for authentication. A service account is a bit like a regular Google account but designed to be used by programs.
We’ll use the App Engine default service account for authentication in this tutorial. That’s the account all Cloud Functions use by default. Alternatively, you can create a new service account just for this use case.
The service account must have access to:
- Search Console (read)
- BigQuery (read, write, create tables and datasets, and create query jobs).
The App Engine default service account has the required BigQuery permissions by default. So, you’ll only need to grant it access to Search Console. You can do this by navigating to Settings -> Users and permissions in Search Console and adding your service account email as a new user. Restricted permission in Search Console is enough for this use case.

You can find your service account’s email from the Service Accounts section in IAM & Admin in Google Cloud. Again, the easiest way to find it is by using the search bar.
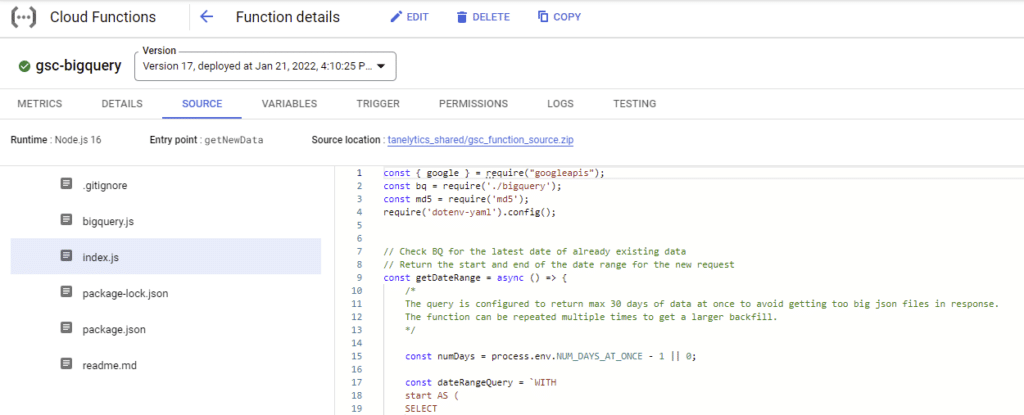
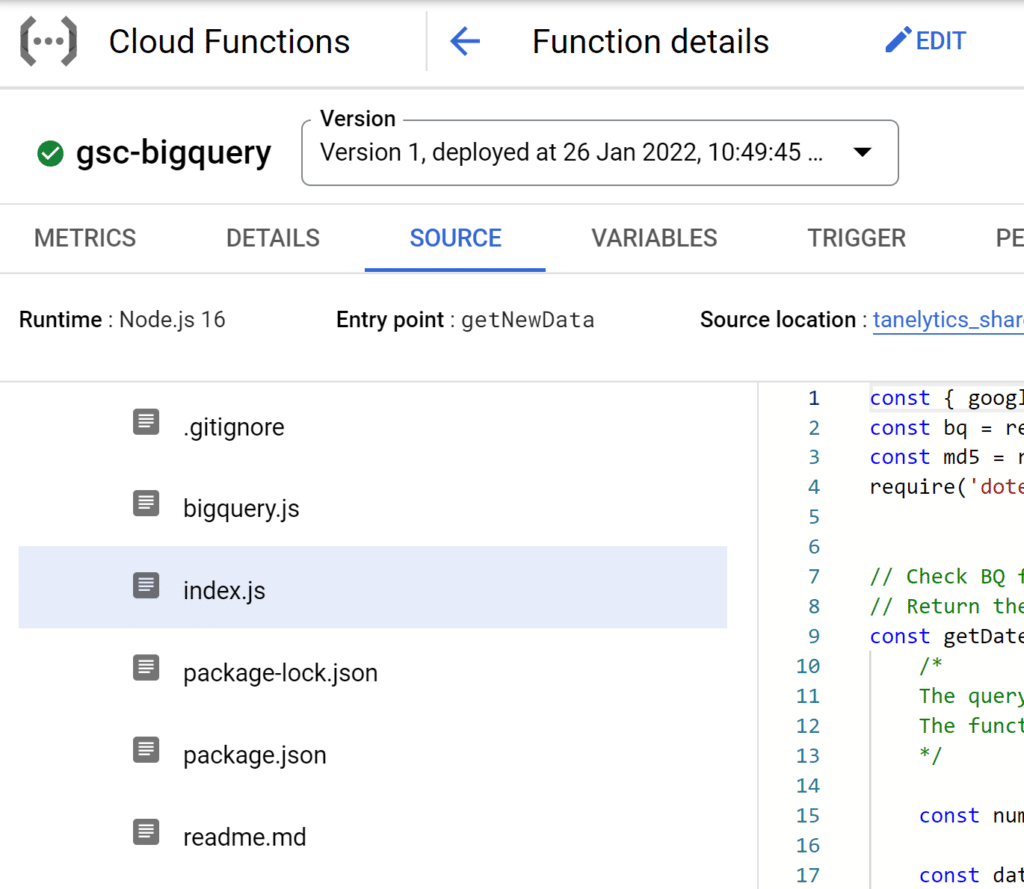
The code
You can check the full source code of the Cloud Function in the GitHub repository.
At first, the function will attempt to create the dataset and table for the export data in BigQuery. If these already exist from a previous run, nothing will be changed.
const setup = {
    dataset: null,
    table: null
};

// check that the dataset and table exist and create them if needed
setup.dataset = await bq.createDataset(process.env.BIGQUERY_PROJECT, process.env.BIGQUERY_DATASET, process.env.LOCATION);

// check that the table exists and create if needed
if (setup.dataset) {
    setup.table = await bq.createTable(process.env.BIGQUERY_PROJECT, setup.dataset, process.env.RESULTS_TABLE);
}
Next, it will check the result table in BigQuery to find the date range for the next Search Console API export. The date range is found by querying the results table for existing data. The query uses input from the function’s environment variables.
const numDays = process.env.NUM_DAYS_AT_ONCE - 1 || 0;

const dateRangeQuery = `WITH
start AS (
SELECT
    coalesce(MAX(date)+1,
    CAST('${process.env.START_DATE}' AS date)) AS date_range_start
FROM
\`${process.env.BIGQUERY_PROJECT}.${process.env.BIGQUERY_DATASET}.${process.env.RESULTS_TABLE}\`)
SELECT
CAST(date_range_start AS string) AS date_range_start,
CAST(date_range_start + ${numDays} AS string) AS date_range_end,
ARRAY(
SELECT
    CAST(date AS string)
FROM
    UNNEST(GENERATE_DATE_ARRAY(date_range_start, date_range_start+${numDays})) AS date) AS dates
FROM
start`;
Once the date range is defined, the function can start extracting data from the Search Console API. You can limit the amount of data returned at once through the NUM_DAYS_AT_ONCE environment variable. If there’s a lot of data per day, it might be best just to extract one day at a time. You can schedule the function to run at a shorter interval in the beginning to make the backfill.
do {
    const res = await gscRequest(date, date, rowLimit, startRow, dimensions);
    if (res && res.rows && res.rows.length > 0) {
        // new rows have been found, collect them to the same array
        gscData.push(res.rows);

        if (res.rows.length < rowLimit) {
            continueLoop = false;
        }

        // set the start row for the next iteration
        startRow += res.rows.length;
    } else {
        // no new rows were found, exit
        continueLoop = false;
    }
} while (continueLoop === true)
Once the function has retrieved new data from the API, it can start streaming it to BigQuery. The data is sent using the streaming API in up to 5,000-row batches.
// start sending the data to BigQuery
const insertPromises = [];
gscData.forEach(data => {
    if (data && data.length > 0) {
        // send the data to BigQuery
        insertPromises.push(bq.streamingInsert(data, process.env.BIGQUERY_PROJECT, process.env.BIGQUERY_DATASET, process.env.RESULTS_TABLE));
    }
});
Deploying the function
The easiest way to deploy the function is through the Google Cloud console using gcloud. You can deploy the function into your own Google Cloud project using the following command (explained later).
gcloud functions deploy gsc-bigquery --region=europe-west3 --entry-point=getNewData --runtime=nodejs16 --source=gs://tanelytics_shared/gsc_function_source.zip --ingress-settings=internal-only --memory=2048MB --trigger-topic=run-search-console-export --timeout=240s --set-env-vars=BIGQUERY_PROJECT=<your-project-id>,BIGQUERY_DATASET=search_console,RESULTS_TABLE=gsc_export,LOCATION=EU,SITE=<your-sc-domain>,START_DATE=2022-01-01,NUM_DAYS_AT_ONCE=3Gcloud deploy command fields
| gcloud functions deploy | The command used for deploying Cloud Functions. |
| gsc-bigquery | The name for the newly created Cloud Function. You can set it to anything you like. |
| –entry-point=getNewData | The entry point is the function from index.js that will run once the Cloud Function is executed. |
| –runtime=nodejs16 | Using version 16 of NodeJS here. |
| –source=gs://tanelytics_shared/gsc_function_source.zip | I’ve uploaded the repository into this publicly available Cloud Storage link. Alternatively, you can replace the source with another location if you’ve downloaded the code from GitHub. |
| –ingress-settings=internal-only | Only allows internal calls to the function. |
| –memory=2048MB | The amount of memory allocated to the function. |
| –trigger-topic=run-search-console-export | This is the name of the Pub/Sub topic that the function will listen to. |
| –timeout=240s | The timeout for the function. |
| –set-env-vars=BIGQUERY_PROJECT=<your-project-id>,BIGQUERY_DATASET=search_console,RESULTS_TABLE=gsc_export,LOCATION=EU,SITE=<your-sc-domain>,START_DATE=2022-01-01,NUM_DAYS_AT_ONCE=3 | This declares the run-time environment variables for the function. Don’t use quotation marks in the variables. All variables are needed. |
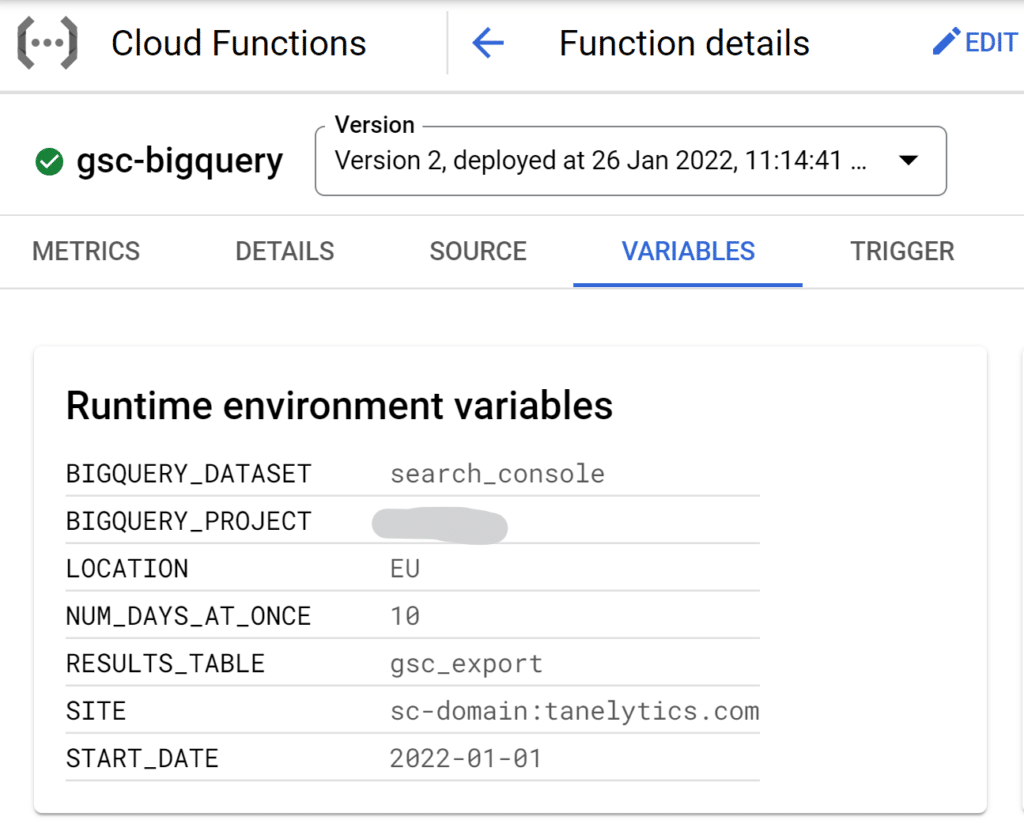
Environment variables
- BIGQUERY_PROJECT = the name of your GCP project
- BIGQUERY_DATASET = the name of the dataset created where the data will be stored
- RESULTS_TABLE = table name in BigQuery
- LOCATION = dataset data location in BigQuery
- SITE = your site in Search Console
- Use the siteUrl format from Search Console API
- For example, sc-domain:tanelytics.com with a domain property or https://tanelytics.com when connecting to a URL-prefix property
- START_DATE = the first day to start from
- NUM_DAYS_AT_ONCE = maximum number of days to return at once.
Another way to deploy the Cloud Function is through the UI. In that case, you would upload the code from GitHub as a zip file. When deploying through the UI, make sure that you specify the same settings as included in the gcloud command.
Runninng the deploy command
You can run the command through Google Cloud Shell. First, open the Cloud Shell from the top navigation in Google Cloud Platform.

Next, copy the prepared deploy command and run it in Cloud Shell. Once successfully deployed, you’ll see a message indicating version id, environment variables, and other settings used in the deployment.
The function’s settings can later be verified and updated through the UI.
Configuring the schedule
Now that we’ve deployed the function, it still needs a trigger. Remember, Cloud Functions only run on demand. So, there needs to be something that invokes the function, in this case, a Pub/Sub message.
Previously, we configured the function to start on any message to the run-search-console-export Pub/Sub topic. Now, we can use Cloud Scheduler to set up that message.
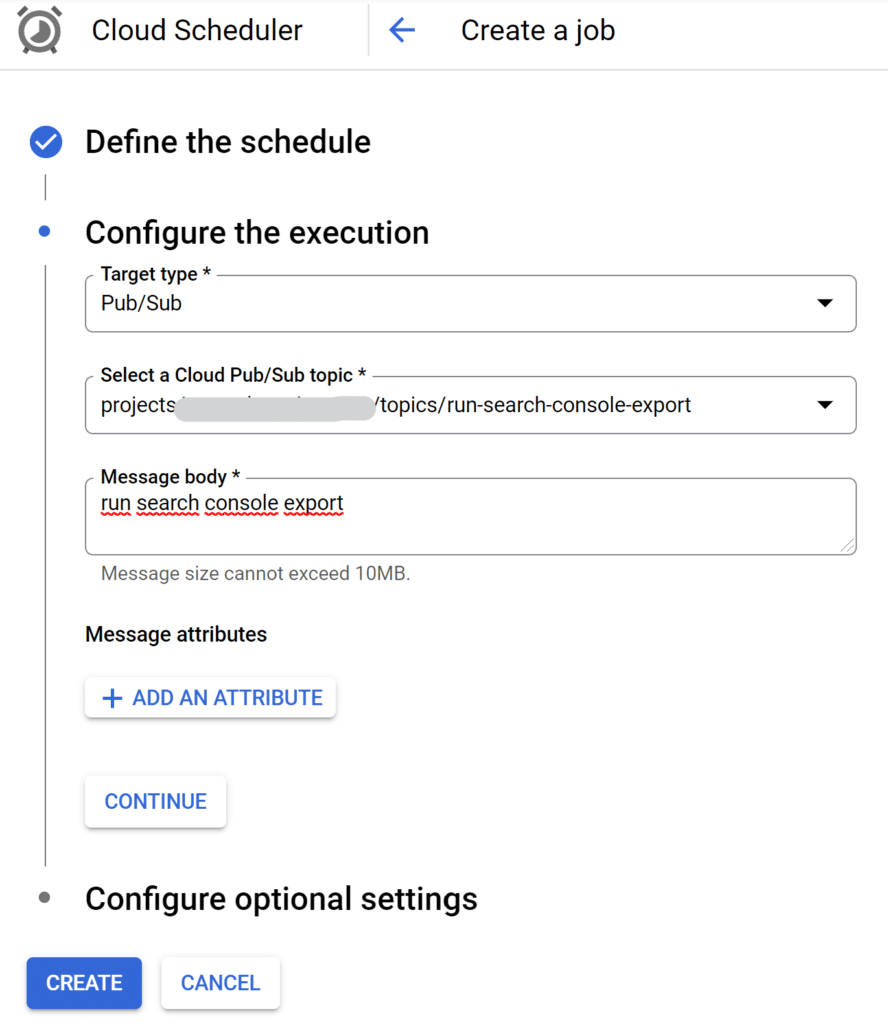
Now, navigate to Cloud Scheduler and click on the Create Job button. Next, you’ll be able to create a new schedule using the CRON format. For example, with the below settings, the schedule would run at 6 AM every day.

Next, specify a target for the schedule. Select Pub/Sub as the target type and then pick run-search-console-export from the list of available topics. You can write anything you like in the message body as the function does not require it.
Testing the setup
You can now send a test Pub/Sub message to trigger the function. Go back to the Cloud Scheduler front page, and from the list of schedules, click the Run Now button of your newly created schedule.

After that, head to Cloud Functions to check the latest logs from your new function. Click the name of your Cloud Function, and navigate to the Logs tab. If the function ran successfully, you should see something like this in the logs:
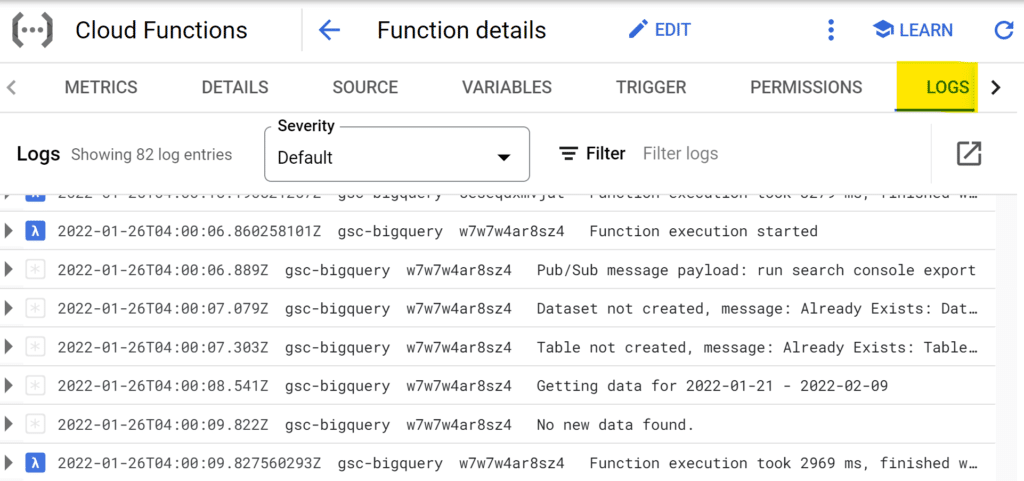
On the first run, the function will create the dataset and table in BigQuery. After that, it can take a couple of minutes before the BigQuery streaming insert is available. Just wait, and rerun the function after a while.
If everything works and there are no errors in the logs, you should see new data in the BigQuery export table created by the function.
Summary
Google Cloud Functions and Cloud Scheduler are an excellent combination for creating simple data integrations. Using Pub/Sub messages and environment variables also makes the functions re-usable.
One way to improve the function would be to start utilizing the Pub/Sub message payload instead of environment variables for some of the settings. For example, if you have many domains in Search Console, you could input the domain name in the message payload instead. You would then have multiple schedules calling the same function but with a different domain name. That way, there would be no need to deploy multiple versions of the same function.

Really cool 🙂 I will definately run a test setup with this, some time.
im using it, thank you
You’re welcome!
hi again,
when i use search console account with domain verification, your solution works. but if dont have search console account with domain verification, its gonna be problem. because could not get process data. i have https://www.domain.com version and did not work. It is only work for https:// version of search console site.
Hi,
I don’t think the https format itself should be an issue. I’ve used the same code for an https site that didn’t have domain verification.
If it works for you already with domain verification and with an http site, then I think it’s most likely an access related issue. Does the service account have access to the https domain in Search Console?
The domain you pass in the environment variables is just forwarded to the Search Console API request. So if it fits the API format for siteUrl, it should work.
gsc.searchanalytics.query({
siteUrl: process.env.SITE,
searchType: “web”,
aggregationType: “auto”,
dimensions: dimensions,
requestBody: {
startDate: startDate,
endDate: endDate,
},
rowLimit: rowLimit,
startRow: startRow,
dataState: ‘final’
});
https://developers.google.com/webmaster-tools/v1/searchanalytics/query#request
I’ve experienced the same issue.
It comes from deploying a function with only a domain name without a protocol i.e. SITE=www.domain.com in the deploy command.
Once the Cloud function is deployed, it can be updated from [Cloud Function] -> Variables -> edit [SITE] -> set to https://www.domain.com
Wait until it’s redeployed and run the Cloud function again.
Used this successfully, great stuff. Any pointers for removing page from the request? Ideally would have two, one request with page and one without (true impressions). Page impression inflation can be significant
Hi Steve,
The getSearchConsoleData function in the Cloud Function’s code has a variable called dimensions:
const dimensions = [
‘page’,
‘country’,
‘device’,
‘query’
];
That’s a list of all the dimensions that the function will request from the API. You can modify that and deploy different versions that extract different dimensions.
At some point I might also release a slightly improved version of this setup that would make selecting the dimensions a bit easier. I think the ideal setup would take the list of dimensions as well as the name of the results table as an input from the pub/sub message. That way the same function could be used for extracting data with different combinations of dimensions.
Hey,
This is a great article 🙂
I’m having a small problem. It keeps saying ‘no file or directory’ for my project even though i’m using the right one.
Can you help?
Best
Mark
Hi, thanks for this thorough guide, have successfully set up this export now. I would also like to have an export aggregated by property, what would I need to update in this setup besides aggregationType in index.js?
The suiteable code for the nodeJS is:
gcloud functions deploy gsc-bigquery –region=europe-west3 –entry-point=getNewData –runtime=nodejs18 –source=gs://tanelytics_shared/gsc_function_source.zip –ingress-settings=internal-only –memory=2048MB –trigger-topic=run-search-console-export –timeout=240s –set-env-vars=BIGQUERY_PROJECT=,BIGQUERY_DATASET=search_console,RESULTS_TABLE=gsc_export,LOCATION=EU,SITE=,START_DATE=2022-01-01,NUM_DAYS_AT_ONCE=3