Server-side Tag Manager can be more than just a proxy for sending data and loading tracking scripts. Server-side GTM clients are essentially API endpoints. With custom templates, you can create custom endpoints, which don’t need to focus solely on forwarding data to analytics tools.
In this blog post, I’ll share a simple server-side GTM client template that you can use to pull visitor user properties back to the website to the client device. You can then push the data to the dataLayer to make it easily accessible for client-side tracking or personalization use cases.
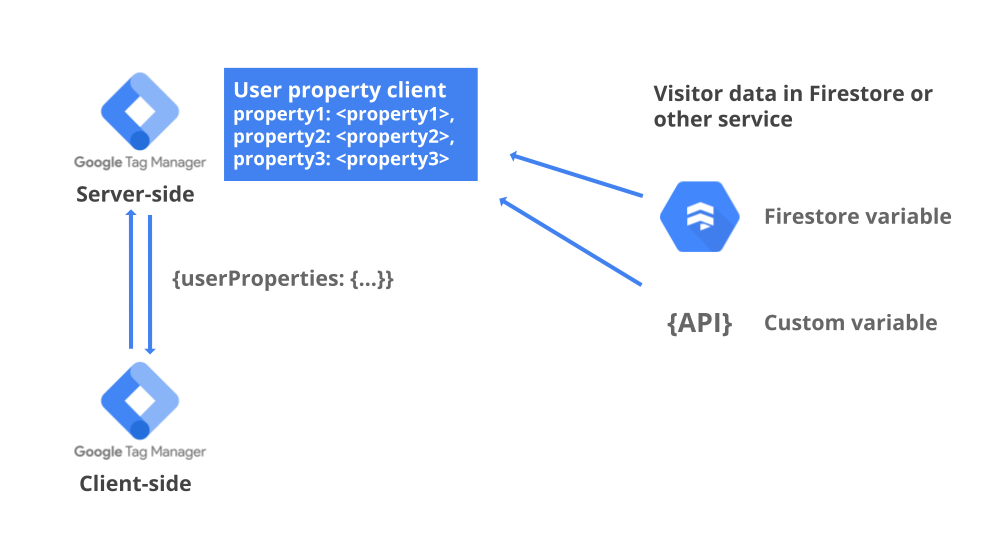
The setup will rely on request cookies to be able to respond with the correct data. You can use the cookie variable in server-side GTM to read the value of a cookie included in the request. With the cookie value as the document identifier, you can retrieve data from Firestore, for example.
Using Firestore for storing the visitor data
Server-side GTM has a built-in variable template for accessing Firestore data. That makes Firestore an excellent option for storing the visitor data to be pushed to the dataLayer.
This post’s focus is not on getting data into Firestore. However, I’d like to share two approaches to how you can do it:
- Real-time data ingestion through Server-side GTM
- The Firestore Writer tag template by Stape in the template gallery does this very nicely.
- Batch update
- You can define your user properties in BigQuery using SQL and then load the data through Storage to Firetore. With this approach, you can use SQL, making more complex logic easier to define. The downside is that there will be a delay in keeping the data up to date in Firestore.
- This blog post by Krisjan Oldekamp is a great read on how to set up the Firestore export.
To get some data for the demo, we can use the Firestore Writer tag to flag each site visitor as awesome_visitor in Firestore. We can use the FPID cookie as the Firestore document key to keeping it simple.
The setup for the Firestore Writer tag looks like this:
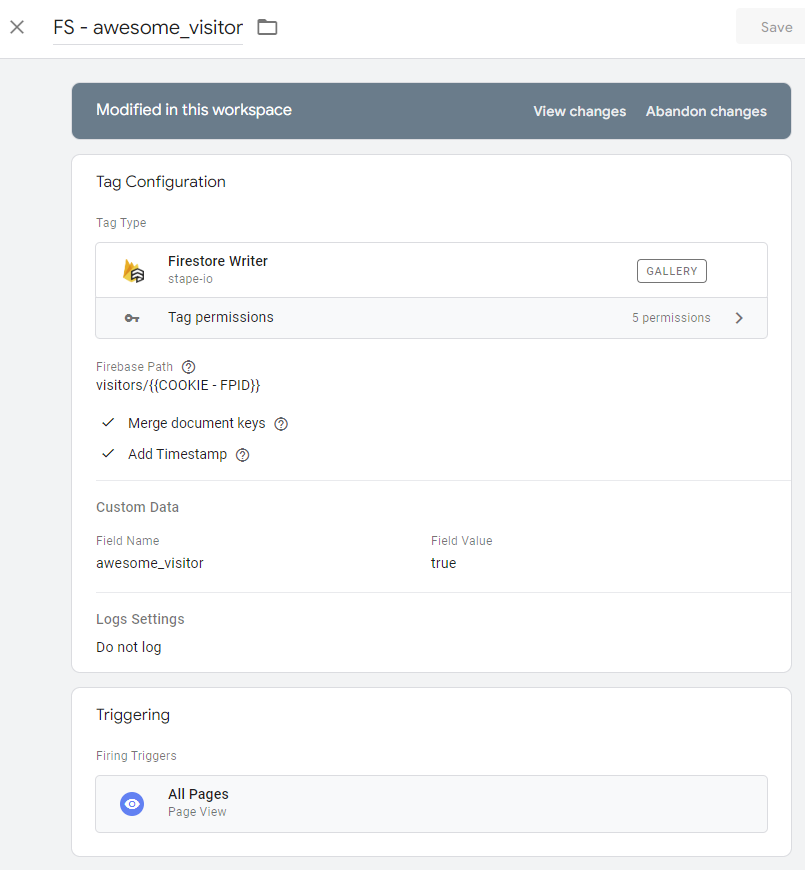
The tag will write the data in a collection named “visitors” to a document with a key matching the value of the FPID cookie. The merge document keys option will merge the data added now with any existing data in the same document.
The COOKIE – FPID variable used in the tag looks like this:
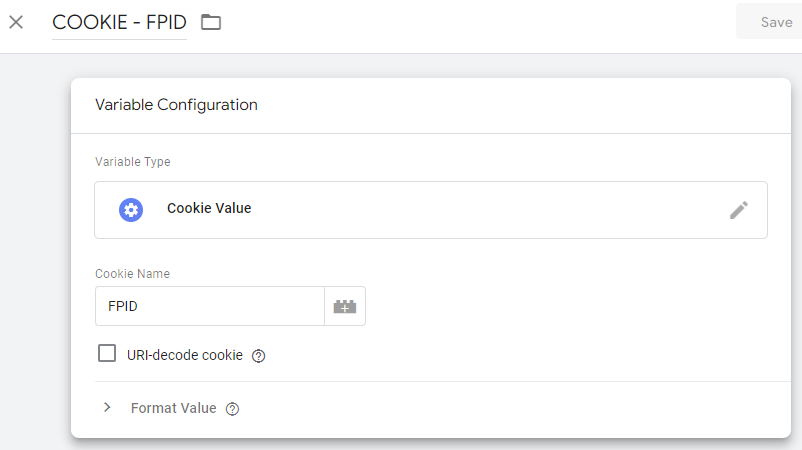
Note that the URI-decode cookie option should remain unchecked. This is because the FPID cookie can contain forward slashes which will break the document structure in Firestore.
With the tag in place, you should start seeing documents like this appear in Firestore:

That’s it. We now have some dummy data that can be fetched and pushed to the dataLayer.
The user property client
Next, we’ll set up the endpoint to retrieve the data from Firestore or another location. You can download the client template file from the link below. Then, create a new client template and use the template file to import the configuration.
The JavaScript code of the template looks like this:
const claimRequest = require('claimRequest');
const getRequestPath = require('getRequestPath');
const logToConsole = require('logToConsole');
const getRequestHeader = require('getRequestHeader');
const JSON = require('JSON');
const setResponseStatus = require('setResponseStatus');
const setResponseBody = require('setResponseBody');
const setResponseHeader = require('setResponseHeader');
const returnResponse = require('returnResponse');

const log = msg => {
  logToConsole('User property client: ' + msg);
};

const userProperties = data.userProperties || [];

const requestPath = getRequestPath();

const requestOrigin = getRequestHeader('origin');
const allowedOrigins = data.allowedOrigins ? data.allowedOrigins.map(origin => origin.origin) : [];

// set the allowed request origin to be used in the response header
let allowedOrigin = allowedOrigins[0] || '*';
if (allowedOrigins.length > 0) {
  allowedOrigins.forEach(origin => {
    if (requestOrigin === origin) {
      allowedOrigin = requestOrigin;
    }
  });
}

// a function for setting the server response
const setResponse = (status, body, allowedOrigin) => {
  setResponseStatus(status);
  setResponseBody(JSON.stringify(body));
  setResponseHeader('access-control-allow-origin', allowedOrigin);
  setResponseHeader('access-control-allow-credentials', 'true');

  returnResponse();
};

// claim the request if the path matches the defined endoint
if (requestPath === data.endpointPath && userProperties.length > 0) {
  log('Claim user property request');
  claimRequest();

  // return a user property response if the origin matches one of the allowed origins
  if (allowedOrigin === requestOrigin || allowedOrigin === '*') {
    const properties = {};
    userProperties.forEach(property => {
      properties[property.keyName] = property.property;
    });

    // map the data into the dataLayer format
    const response = {
      event: "user_data",
      user_properties: properties
    };

    // send the dataLayer event as the response
    setResponse(200, response, requestOrigin);

  }

  // send an empty response
  setResponse(200, {}, allowedOrigin);
}
Once the template is imported, we can use it to create a new client.
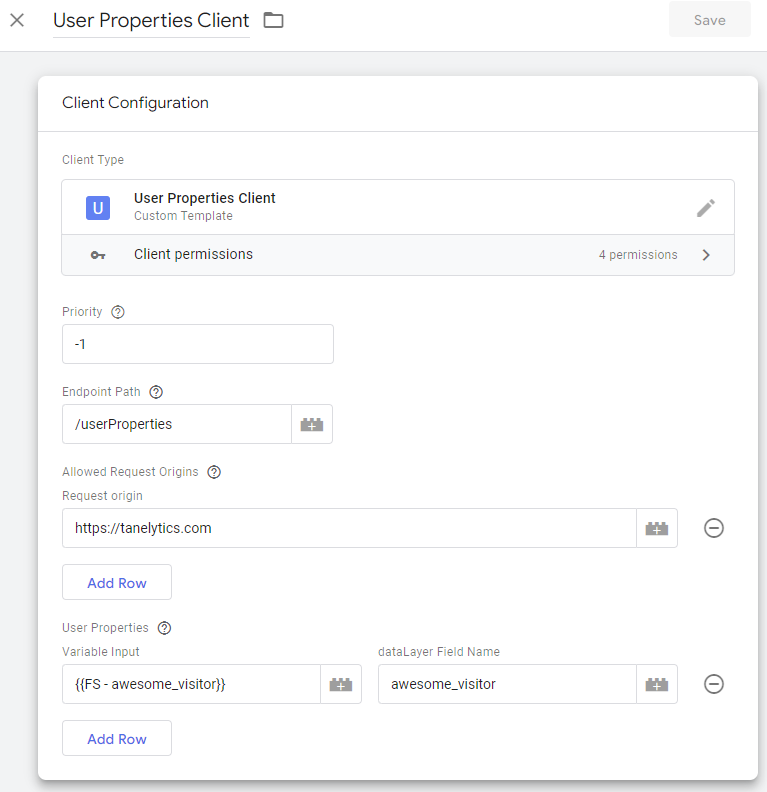
The client template has four configurations:
- Priority
- The priority in which clients will claim the incoming request. If two clients are set to capture the same request, only the one with the higher priority will claim it.
- Endpoint
- The path on which the client will claim the request and respond. The path should not conflict with any of the other clients.
- Allowed Request Origins
- Used to set the Access-Control-Allow-Origin response header. If none are specified, the header will allow requests from all origins.
- User Properties
- The user properties parameter table is used for mapping the data to the dataLayer push. You can use Firestore variables or any other variables as the data input.
The FS – awesome_visitor variable in the example client will return the awesome_visitor field from a Firestore document. The FPID HTTP cookie is used to find the correct document.
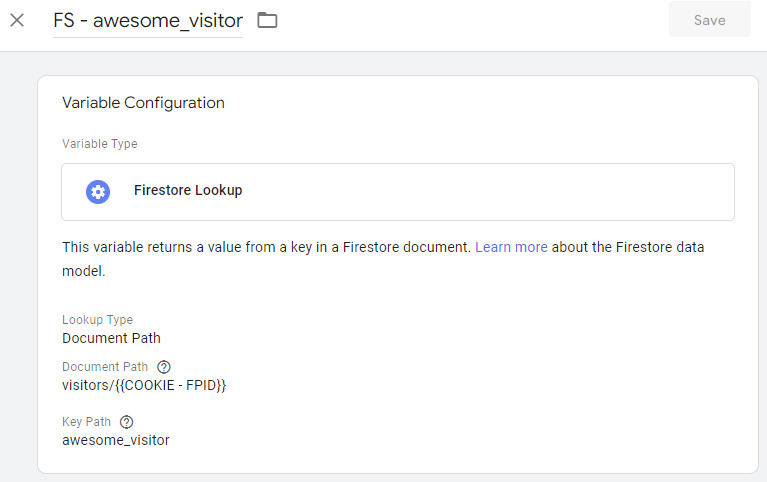
The server-side client doesn’t actually know from where the data will be retrieved. That makes the client relatively straightforward as we don’t have to set up permissions or the logic for how to retrieve the data. Instead, the logic will be inside the variables you include in the client.
Setting up the dataLayer push in client-side GTM
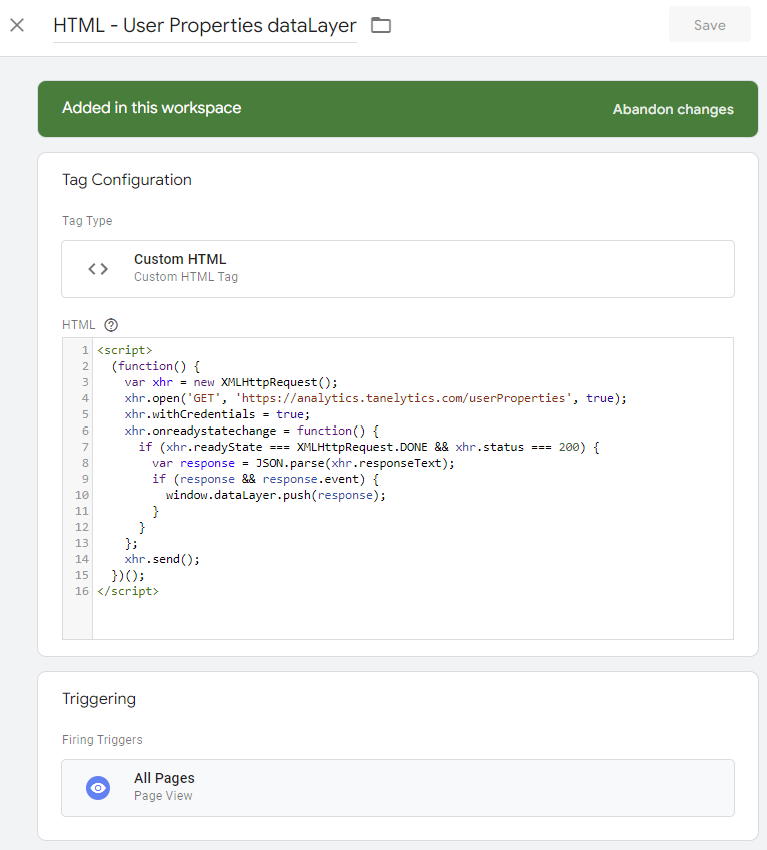
Now that the endpoint in server-side GTM is ready, we can start sending requests to it from client-side GTM. We can use a custom HTML tag to make the request to the API. Replace the request URL with the URL pointing to the endpoint that you defined in the client.
<script>
  (function() {
    var xhr = new XMLHttpRequest();
    xhr.open('GET', '<your server-side client endpoint>', true);
    xhr.withCredentials = true;
    xhr.onreadystatechange = function() {
      if (xhr.readyState === XMLHttpRequest.DONE && xhr.status === 200) {
        var response = JSON.parse(xhr.responseText);
        if (response && response.event) {
          window.dataLayer.push(response);
        }
      }
    };
    xhr.send();
  })();
</script>
The dataLayer push will include data from all variables included in the client. If no data can be found, the dataLayer message will be empty.
The example FS – awesome_visitor variable relies on the FPID cookie value for finding the correct document. Because of that, the request must include credentials.
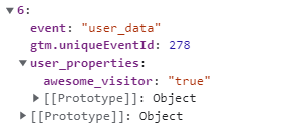
With the server-side client and the client-side dataLayer push in place, you should see an event like this on the dataLayer.
Summary
The server-side client created in this blog post is fairly simple as it relies on the variables to define the logic for how the data should be retrieved.
In the example, we used the FPID cookie as the document key in Firestore. The entire value of the FPID cookie might not be ideal as it also contains other information like the cookie version. You might also have some visitors that don’t have their cookie migrated to the HHTP FPID cookie and have a _ga cookie instead.
Another approach for passing the user identifier to the client would be to use a query parameter. You can include a query parameter to the request sent from the custom HTML tag. In server-side GTM, that query parameter can be accessed using a Query Parameter variable. You can then use that variable instead of the cookie variable for setting the document path in the Firestore variable, for example.